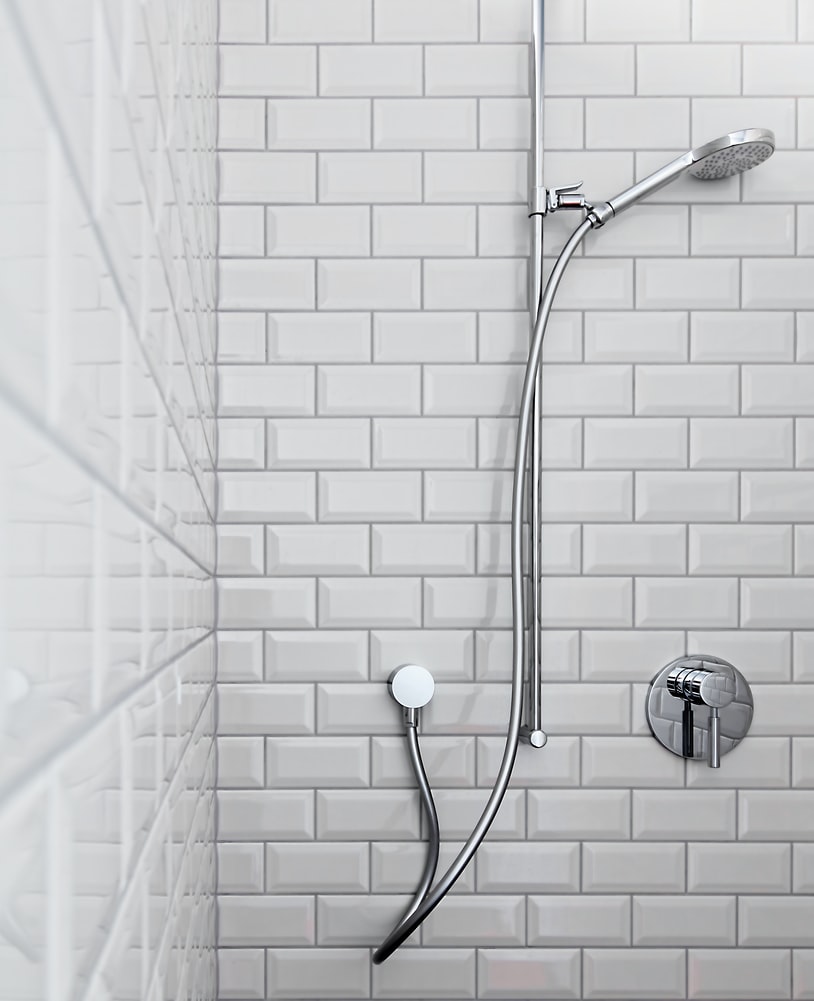
HOT WATER NOT COMING OUT OF YOUR SHOWER?

hot water not coming ouit of shower

Though it’s often always pretty warm in Texas during the winter, the last thing you want is no hot water coming out of the shower! An immediate solution would be to check your water tank, which is where the hot water is being supplied from. Water heaters (or water tanks) are usually located in hidden places like your basement, attic, garage, or even a closet. FYI, the location of your water heater also affects how quickly the water in your house gets hot.

While your water tank could be the most obvious reason for finding any issues with the water heating, it isn’t the only one. There are a few other things you can look at when trying to find the reason the water isn’t heating in your household. Quarter Moon Plumbing, AC & Heating has a few tips for you if hot water is not coming out of your shower.

CHECK THE TEMPERATURE

Mist Showers: Sustainable Decadence? - Resilience

Sometimes, it’s the little things. While checking the temperature of the water heater may sound like a no-brainer, there are a few other things to consider. If you have an electric water heater, check for any elements that might have burned out; water will either heat for a short period of time or not heat at all if there is an issue. If you have an older model, the cold-water supply dip tube may have deteriorated. The dip tube allows for cold water to run down to the burner to heat it up. Instead of the cold water going to the burner for heating, it escapes into the hot water feed pipe. Thus causing cold water to come out. Make sure you check the temperature of your water heater to rule this factor out.

WATER TANK, INSPECT IT!

Cordless Hot Water Tanks : tankless water heater

As previously mentioned, your water tank can be located in either your basement, attic, garage, or closet. After locating it, the first thing you want to check is the age and condition of your water tank. Like many appliances, water tanks are subject to wear and tear over time. A second thing to look out for is leaks and checking the connections. At times, the connections on your water heater may need to be tightened or sometimes may need to be replaced. Lastly, check the anode rode (which is a steel wire coated in either aluminum or magnesium which helps prevent the water tank from rusting) and look out for sediment build-up. If the anode rode is worn away or covered in sediment buildup, this could be the underlying reason why your water isn’t heating.

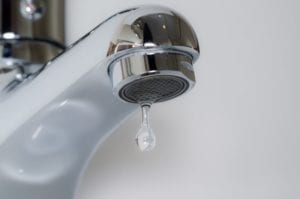
CHECK OTHER FAUCETS IN THE HOUSE

To determine whether it’s a water tank issue or a shower component issue, check the temperature of the hot water in the other faucets in your home. If the temperature of the hot water cools quickly, you may have a burner problem with your water tank. If there is no hot water coming out at all, it could be a faulty dip tube. Now, if all the other faucets have running hot water, then the issue may lie in your shower components.

INSPECT YOUR SHOWER VALVE

Your shower valve might need to be checked if the only place in your household that isn’t getting hot water is your shower. The shower valve is in charge of mixing both hot and cold water to make it the perfect temperature for your shower. Sometimes, the washers or O-rings have worn out which makes the valve not properly work. This can cause cold water to come through the showerhead. You may need to replace some of these parts if there is an issue with your shower valve.

IF YOU CAN’T RESOLVE THE PROBLEM, CALL THE EXPERTS!

We are always looking out for the comfort and protection of our clients. If you suspect there might be an issue with your plumbing, AC, or heating, call us today for an inspection at contact us on our website.

5 REASONS YOUR FAUCET IS DRIPPING WATER & HOW TO FIX IT

5 Reasons Your Faucet Is Dripping Water & How To Fix It

Did you know that a leaking faucet can waste up to a hundred dollars worth of water? And that’s just a minor leak. A larger faucet leak can waste more than 30 gallons of water a day, putting a significant dent in your wallet. To help you save money, we have compiled a list of 5 causes of leaky faucets and how to fix them.

5 CAUSES OF LEAKY FAUCETS

There are many more causes of leaky faucets than you might think. Here are the main five causes:

A DAMAGED CARTRIDGE

If you have a faucet with two handles, one for hot water and the other for cold, then you have a cartridge-style faucet. The cartridge is a valve on each handle that controls the flow of the water into the faucet spout. If your faucet is dripping water, this is a sign of damage to the cartridge.

BROKEN WASHERS

A common cause of a leaking faucet is broken washers. Washers rest against the valve seat, and over time, friction can cause the washers to wear out. This then leads to leaking. If a washer is the wrong size or not installed properly, it can also lead to leaking.

WATER PRESSURE

If you notice that the faucet in your bathroom only drips water during certain times or when your faucet’s handles move a certain way, then it could be your home’s water pressure that is causing the leaks.

5 Reasons Your Faucet Is Dripping Water & How To Fix It
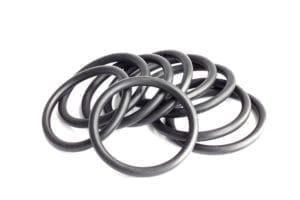
MALFUNCTIONING O-RING

An O-ring is located in the sink’s faucet. It is a small disc that is attached to the stem screw to hold the handle of the faucet in place. Similar to washers, O-rings can get worn out or loose. If one of your faucet’s handles is leaking, this is probably the cause.

DETERIORATED VALVE SEAT

If your faucet is leaking from the spout, then it could be the valve seat. The valve seat connects the faucet to the spout. Sediment can build up and corrode the seat, causing a leak.

Tips & Insights: The Advantages of Investing in a New Condensing Furnace

HOW TO FIX A LEAKY FAUCET

Save yourself some money by fixing a leaky faucet yourself. Be your own repairman—or repairwoman—and follow these steps:

5 Reasons Your Faucet Is Dripping Water & How To Fix It
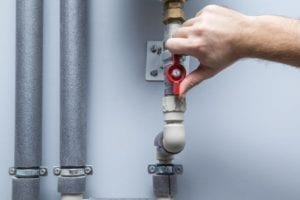
DEACTIVATE THE WATER

One of the most important steps in fixing a leaking faucet is to turn off the water. If you do not shut off the water to the sink, you could end up flooding your bathroom. To shut off the water, look for the fixture shutoff valves below the sink and turn the handles clockwise. If your faucet doesn’t have any shutoff valves, turn off the main water supply for the house. Check to make sure that the water is off by turning the faucet on. If no water comes out, then you did your job.

DISASSEMBLE THE FAUCET HANDLES

The way to remove the handles of a dripping faucet depends on the type of fixture. For standard fixtures, you can use a flathead screwdriver to remove the caps on top of the handle, revealing handle screws. Unscrew these and pull the handles off.

DETACH THE VALVE STEM

Once the faucet handle is removed, you will see the inner valve stem or cartridge. This also needs to be removed. Compression faucets have a brass valve stem that can be unscrewed. Cartridge faucets can be pulled straight out. If you are having trouble, you can refer to your faucet manual or look up instructions online.

5 Reasons Your Faucet Is Dripping Water & How To Fix It
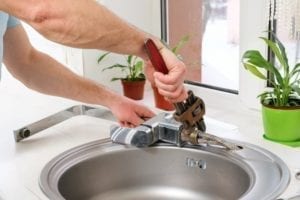
INSPECT THE PARTS OF THE SINK

Once you have taken all the parts out, carefully inspect them to confirm what needs to be replaced to fix the leaking faucet. You should see rubber washers, O-rings, and seals.

REPLACE THE DAMAGED PARTS

If any parts are old or worn out/damaged, replace them. Go to your local hardware store and find the parts you need. The best and easiest way to get the right parts for your dripping faucet is to bring the old ones into a hardware store and ask for exact duplicates.

Tips & Insights: What Are the Pros & Cons of Buying a Heat Pump?

SANITIZE THE VALVES

Look at the valve body after you have removed the stem or cartridge. Usually, there tends to be mineral buildup. To clean it, pour white vinegar over the valve seat and let it soak for a couple of minutes. Then scrub it away, and scrub the other parts of your sink to restore it’s shininess and smoothness.

PUT THE FAUCET TOGETHER

Once you have the new replacement parts and have cleaned everything, reassemble the faucet. Turn the water supply on and check for any leaks.

5 Reasons Your Faucet Is Dripping Water & How To Fix It4 TYPE OF FAUCETS

Knowing the 4 common types of faucet will help you know how to disassemble and fix it if need be.

CARTRIDGE FAUCETS

Cartridge faucets are commonly found in bathrooms and are characterized by the two handles on either side of the spout. The handle moves up and down to turn the water on or off. The inner workings of the sink contain a cartridge that moves up and down to control the flow of water.

DISC FAUCETS

Disc faucets are newer faucets, and typically a bit more expensive than other standard options. They are extremely durable and reliable. Disc faucets have only a single lever to operate them. The lever sits atop a cylindrical body.

Tips & Insights: 5 Advantages of Installing Radiant Floor Heating Systems

BALL FAUCETS

These faucets use a ball joint to control the hot and cold waterlines. They are characterized by a single handle on a rounded cap mounted on top of the spout. To work them, you push up and down to adjust the pressure, then left or right to adjust the temperature. They’re common in kitchens and other high-use areas.

COMPRESSION WASHER FAUCETS

Although they are the oldest type of faucet, compression washer faucets are still commonly used today. They use rubber washers to tightly seal against the flow of water. They have two handles that do not move up or down, only side to side. The most identifiable trait of compression washer faucets is that you can feel the handle of the faucet getting tighter as you shut it off.

FAUCET & PLUMBING INSTALLATION SERVICES

If you cannot fix a leak in your faucet, give our team a call us. We offer emergency plumbing services and will address the situation quickly. Once we discover the source of the problem, we will let you know the parts and components that need to be replaced to fix the dripping faucet. Do you need help with a different plumbing problem? In addition, to fixture repair solutions, we offer other types of services such as water heater repair and sump pump installation.

Solved! What to Do About a Leaking Garbage Disposal

Suspect a leak in one of your kitchen’s hardest working appliances? Troubleshoot the problem and repair a leaking garbage disposal with these tips and techniques.

By Bob Vila

How to Fix a Leaking Garbage Disposal Yourself

Photo: istockphoto.com

Q: Lately, the cabinet under my kitchen sink has been getting mysteriously soggy. Could this be a symptom of a leaking garbage disposal? If so, how can I repair it myself?

A: A leaking garbage disposal often goes unnoticed until you confront a sopping cabinet, a foul-smelling puddle, or an audible drip-drip-drip from the unit. The fix can be frustrating, too, because the leak can stem from a number of components in the system. Fortunately, with a little sleuthing, you can zero in on the leak and—depending on the exact location—stop the icky oozing and repair the component that caused it. Worst case scenario, if it turns out that the garbage disposal must be replaced, installing a new one is a reasonable do-it-yourself task for those with basic plumbing skills. Read on to keep the cash you’d otherwise hand over to a pro.

How to Fix a Leaking Garbage Disposal Yourself

Prepare to find the leak.

Prior to testing the garbage disposal for leaks, unplug it at the wall outlet and turn off the power from the breaker box to prevent electrical shock. Then insert a watertight sink stopper into your sink drain and wipe the unit dry with a clean cloth. In any handy container, mix a few drops of food coloring into a few cups of water, and pour the dyed water onto the sink stopper to help you locate the leak.

Investigate the source.

Using a flashlight, examine the unit for escaping colored water, which is likely to come from one of three places:

  • the top, where the disposal meets the sink drain
  • the side, where the dishwasher hose or main drain pipe connects to the disposal
  • or the bottom of the unit

Inspect each of these locations while gliding a light-colored rag over the unit; the dyed water will readily show on the rag and reveal the location of the leak. If a leak isn’t immediately apparent, remove the sink stopper and pour a few more cups of dyed water down the sink drain, then check for leaks again. Leaks near the top of the unit are more likely to show themselves while the sink is plugged, while side and bottom leaks are more noticeable while the sink is unplugged.

How to Fix a Leaking Garbage Disposal Yourself

Photo: istockphoto.com

If the top of the garbage disposal is leaking, re-seal and tighten the flange.

The metal sink flange that sits directly inside the sink drain is typically sealed around the top with the plumber’s putty (a clay-like sealant) and then secured from under the sink with bolts. If the plumber’s putty deteriorates, or the bolts loosen, the flange can no longer form a watertight seal between the sink drain and the disposal—which could cause a leak at the top of the unit.

To reseal the leaky flange, you must first detach the garbage disposal. Start by loosening the screws securing the main drain pipe to the disposal, then loosen the screws in the metal clamp securing the dishwasher hose to the disposal and detach the drain pipe and dishwasher hose from the disposal. Loosen the screws in the mounting ring that connects the disposal to the metal mounting assembly beneath the sink, then pull down the disposal and carefully set it on a clean, dry surface. Loosen the bolts in the mounting assembly with a wrench, then pull down the mounting assembly and set it near the disposal.

Lift the sink flange from the top of the sink. Use a plastic putty knife to scrape off the old plumber’s putty around the top of the flange, then wipe off any putty residue with a damp rag. Now grab a palmful of plumber’s putty (available at hardware stores, home centers, and online) and roll it into an eighth-inch to quarter-inch-wide “rope” with a length roughly equal to the circumference of the flange. Wrap the rope of putty around the top of the flange like a collar, then insert the flange into the sink drain opening until snug. Re-install the mounting assembly and mounting ring (taking care to securely tighten the mounting bolts on the mounting assembly), then re-attach the garbage disposal, drain pipe, and dishwasher hose in the reverse order you detached them.

If you see that it’s the side of the garbage disposal leaking, tighten drain line connections and replace worn gaskets.

Two drain lines extend from the sides of a garbage disposal: a narrower dishwasher hose that connects the dishwasher drain pipe to your disposal’s dishwasher inlet, and the main drain pipe that connects your disposal to the sewer through an outlet in the wall.

Prepare to find the leak.

Prior to testing the garbage disposal for leaks, unplug it at the wall outlet and turn off the power from the breaker box to prevent electrical shock. Then insert a watertight sink stopper into your sink drain and wipe the unit dry with a clean cloth. In any handy container, mix a few drops of food coloring into a few cups of water, and pour the dyed water onto the sink stopper to help you locate the leak.

Investigate the source.

Using a flashlight, examine the unit for escaping colored water, which is likely to come from one of three places:

  • the top, where the disposal meets the sink drain
  • the side, where the dishwasher hose or main drain pipe connects to the disposal
  • or the bottom of the unit

Inspect each of these locations while gliding a light-colored rag over the unit; the dyed water will readily show on the rag and reveal the location of the leak. If a leak isn’t immediately apparent, remove the sink stopper and pour a few more cups of dyed water down the sink drain, then check for leaks again. Leaks near the top of the unit are more likely to show themselves while the sink is plugged, while side and bottom leaks are more noticeable while the sink is unplugged.

To reseal the leaky flange, you must first detach the garbage disposal. Start by loosening the screws securing the main drain pipe to the disposal, then loosen the screws in the metal clamp securing the dishwasher hose to the disposal and detach the drain pipe and dishwasher hose from the disposal. Loosen the screws in the mounting ring that connects the disposal to the metal mounting assembly beneath the sink, then pull down the disposal and carefully set it on a clean, dry surface. Loosen the bolts in the mounting assembly with a wrench, then pull down the mounting assembly and set it near the disposal.

Lift the sink flange from the top of the sink. Use a plastic putty knife to scrape off the old plumber’s putty around the top of the flange, then wipe off any putty residue with a damp rag. Now grab a palmful of plumber’s putty (available at hardware stores, home centers, and online) and roll it into an eighth-inch to quarter-inch-wide “rope” with a length roughly equal to the circumference of the flange. Wrap the rope of putty around the top of the flange like a collar, then insert the flange into the sink drain opening until snug. Re-install the mounting assembly and mounting ring (taking care to securely tighten the mounting bolts on the mounting assembly), then re-attach the garbage disposal, drain pipe, and dishwasher hose in the reverse order you detached them.

If you see that it’s the side of the garbage disposal leaking, tighten drain line connections and replace worn gaskets.

Two drain lines extend from the sides of a garbage disposal: a narrower dishwasher hose that connects the dishwasher drain pipe to your disposal’s dishwasher inlet, and the main drain pipe that connects your disposal to the sewer through an outlet in the wall.

If you spy a leak on the side of the disposal where the dishwasher hose meets the disposal’s dishwasher inlet, the problem could be that the metal clamp connecting them is loose. In that case, tighten the screws in the metal clamp with a screwdriver.

If the leak is on the side where the disposal meets the waste drain pipe, loosen the screws that secure the drain pipe to the disposal and inspect the rubber gasket inside the pipe—it may well be worn out. Replace the gasket and re-tighten the drain pipe screws.

If the bottom of the unit is leaking, replace the disposal.

Leaks from the bottom of the garbage disposal (often from the reset button) commonly indicate that at least one seal on the interior shell of the unit that protects the motor has deteriorated, or that the shell itself has cracked. These vulnerabilities can cause water from the sink to seep into the shell of the disposal and leak out of the base of the unit. In an old garbage disposal, one compromised internal seal is often accompanied by others, so your best bet is to install a new one.

Hiring a pro to replace the unit will run you $400 on average, including labor and parts, or you can install a garbage disposal yourself and save anywhere from $90 to $200 in labor costs. You should be able to get eight to 15 years of use out of a new garbage disposal.

Check your work by running water through the drain.

Whether you repaired or replaced the leaking garbage disposal, test for any missed problem spots. Wipe the unit dry with a clean cloth, then unplug the sink drain (if plugged) and pour a few cups of dyed water into the drain once more. Use a flashlight to inspect the entire unit. If you don’t observe a leak, turn on the power to the disposal from your breaker box and plug in the disposal at the wall outlet.

Prevent future leaks.

Proper use of a garbage disposal can stave off future leaks. So remember to grind only soft foods; hard items such as bones, apple cores, or raw potatoes can dislodge or damage the internal seals. Run cold water through the sink drain before and after food disposal to keep solid fats from congealing into the gunk (which can deteriorate the sink flange and cause leaks). Finally, inspect your disposal for leaks at least twice a year using the dyed-water test to catch and repair minor leaks before they lead to water-damaged sink cabinets or kitchen floors.