16 Super Easy DIY Home Improvement Ideas

Home Improvement Ideas and DIY Projects | DIY

Ever wished that you could give your home a new look without the extensive cost and time of a complete renovation? Well if you’re willing to put in a little bit of work, there are plenty of DIY home improvement projects you can undertake that will help transform your space—no contractor required.

The key to choosing the perfect DIY home improvement task is to focus first on what you’re trying to accomplish and then consider how much time you want to spend doing it. While all of these projects are easy to complete, some are more time intensive than others so you want to be sure that you know what you’re getting into when you get started. On the bright side: none of these projects should take you more than a weekend or two, and many of them can be done in just a couple of hours or less.

Tools ready? Here are 16 DIY home improvement ideas for upgrading your home without the losing your mind (or your savings).

Home Improvement Ideas for the Kitchen and Bath - Electronic House

  1. Swap out dated fixtures

    It’s amazing what a new fixture can do for a room. Ditch those frosted glass pendants in the kitchen for contemporary glass globe fixtures complete with Edison bulbs; hang a chandelier above the master bed; get rid of your old ceiling fans and replace them with fans that are more modern and efficient. As long as you already have the wires in place, swapping in new light fixtures is a fast project that brings a major improvement to any room.

  2. Go for a yellow glow

    Speaking of light fixtures, you can completely change the ambiance in your home for the better simply by replacing any harsh white bulbs with calming yellow ones. Be sure to opt for LEDs so that your new bulbs last for a long time. Another way to maximize your home’s inner glow: install dimmers in place of existing light switches so that you can set the brightness in each room depending on your mood and the time of day.

  3. Maximize the utility of unused corners with shelving

    We all have corners in our homes that we don’t quite know what to do with. One easy DIY solution: install some simple floating shelves, which give you more storage space and look great at the same time. It requires a bit of woodwork, but it’s worth it to take a previously unused corner and turn it into a statement corner.

  4. Hack your furniture

    If you’re sick of your old furniture but don’t want to spring for the cost of replacements, go with the next best thing and upgrade your existing pieces. There are a ton of creative options for giving new life to old furniture, including painting, reupholstering, and using adhesive contact paper to add shapes and designs.

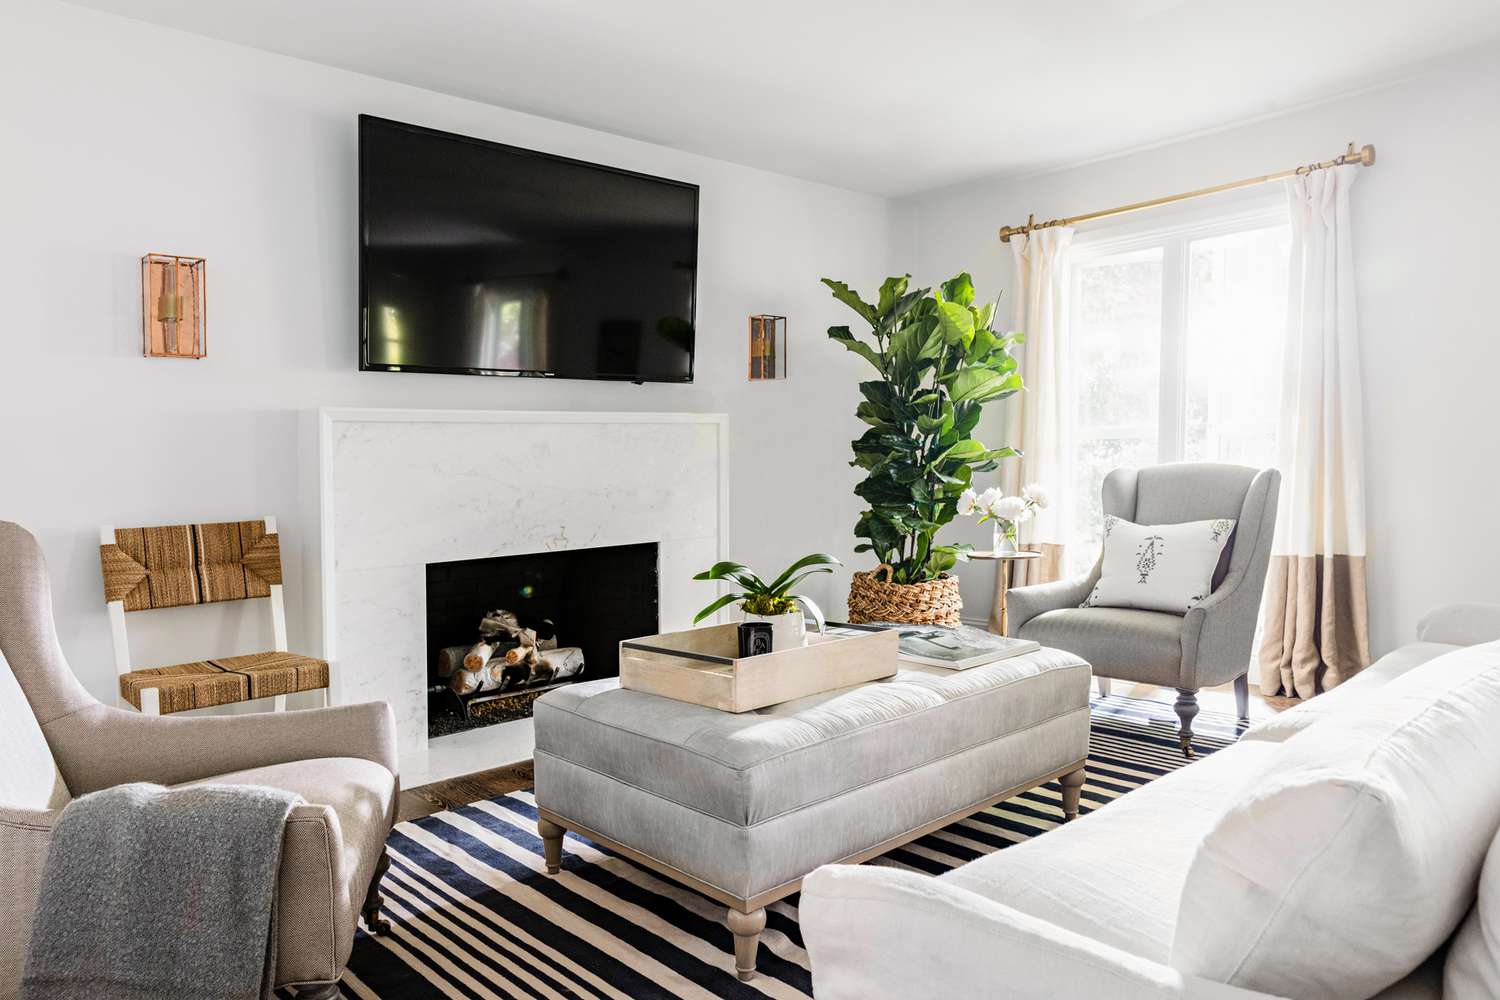
  5. Bring the outside in

    Few things have the power to update bland or dated spaces like plants and flowers. Even the most simple of potted plants freshen the air and add a dose of happiness and vitality to any room. If you have more of a black thumb then a green one, start easy by choosing a durable plant that is tough to kill. You can even game the system by choosing to go with faux-greenery or flowers, just be sure to purchase high-quality ones so they don’t look overtly fake.

  6. Put on a fresh coat of paint

    When it comes to DIY home improvement projects, few things update your space more dramatically than a couple coats of paint. Embrace a pop of color with an accent wall in your living room or bedroom; make a statement with a painted ceiling; paint your kitchen cabinets. While you’re at it, go around your home and provide quick paint touch-ups anywhere that existing paint is peeling or chipped.

  7. Enhance your entryway

    The interior entryway is one of the most utilized spaces in a home, but also often one of the most underappreciated when it comes to design. Get more out of yours with a few easy upgrades, such as installing a bench and hooks for a quick DIY mudroom or adding a new rug to improve the comfort and style of the space. Look for pieces that provide both fashion and function, and that mirror the aesthetic of the rest of your home.

  8. Get smart

    Technology has brought a lot to home improvement, so why not take advantage? From self-programmable thermostats to camera-enabled doorbells, there are a ton of smart home features that seamlessly integrate into your existing wiring and systems while offering major transformations in terms of your home’s energy efficiency and design.

  9. Create a space just for your pet

    Incorporate your pet into your mini home makeover by creating a special place just for them. Pet décor has come a long way, and it’s easier than ever to find pieces that aren’t just fun and/or comfortable for your pet but that also enhance the entire look of a room—think pet teepees, on-the-wall cat jungle gyms, and fancy water fountains, all of which make life just a little bit brighter for both your home and your favorite furry friend.

  10. Make your cords disappear

    Messy cords—hanging off the TV, scattered next to the night stand, snaking from your desk to the wall, etc.—are an unsightly addition to your home. Get them out of sight and out of mind with DIY tricks for making them disappear. Even if you’re not comfortable hiding them behind the walls (or if you rent and can’t exactly cut out a piece of drywall) there are still a variety of crafty options for hiding cords and streamlining your space.

  11. Put up adhesive veneers

    Adhesive veneers are simple to install wall coverings that give the illusion of texture. With just a little bit of patience and a steady hand you can add a shiplap-inspired backsplash to your kitchen or a faux brick wall to your bedroom, both of which give an updated appearance to a space without a total overhaul.

  12. Freshen up tile and grout

    It’s hard to avoid staining on the tile and grout in your bathroom, but it’s surprisingly easy to remedy. Use a designated tub and tile refinishing kit and follow the directions closely to get your tile and grout looking just as good as they did on day one. Your bathroom will have the appearance of new tile, without the cost of actually undertaking that type of project.

  13. Organize your closets

    Here’s a DIY home improvement task that doesn’t require any tools or cost any money but will make a huge difference in your home. Just as you would do before a move, clean out your closet entirely and sort each of your garments into one of three piles: keep, toss, or donate (more on where to donate clothes here). If you want, you could invest in some new closet organizers, or you could work with what you already have and just edit down your wardrobe so that you have enough space for everything. Before putting your clothes back, give your closet a thorough vacuuming and scrub down for a complete refresh.

  14. Replace cabinet hardware

    New cabinets are expensive, but new cabinet hardware can give a similarly dramatic uplift to the appearance of your kitchen or bathroom for significantly less money. Measure the length between the drill holes of your current hardware so that you know the right size to get, then choose a style that complements the existing style of your cabinets while also giving them an impressive new look. You can do the same for dresser drawers in the bedroom.

  15. Mirror, mirror on the wall

    Mirrors bring more light into rooms and make spaces appear larger than they really are. Buy a few mirrors that you really like (secondhand shops are a great place to start your search!) and hang them in areas that you think could add a dash of brightness. While you’re at it, try to find new mirrors that you can use to replace any old or boring ones in your home’s bathrooms.

  16. Turn a non-essential closet into an office

    If you’ve always wanted your own home office but couldn’t find the space, turn a closet into a room where you can get work done. Clear out the closet completely, remove the doors and hinges, and then decorate as you’d like, including adding in a desk and custom shelving. In a weekend or two you could go from having no home office to having a private little nook that’s perfect for productivity.

50+ Best Home Improvement Ideas on a Budget—DIY Home Improvement

Sometimes it’s the smallest of changes in your home that make the biggest impacts. Tackle one (or more!) of these DIY home improvement ideas and discover just how easy it is to update your space without having to devote a ton of money or time to complicated projects.

Our Top 10 Plumbing Tips

Top ten plumbing tips

Plumbing is just kind of there for most of us. We don’t spend a lot of time thinking about it, or worry about maintaining it. But when it suddenly stops working properly, or we run into a problem, boy do we notice!

It’s absolutely no fun to deal with plumbing problems. That’s why we’ve made this list of our top plumbing tips that will help prevent some of your biggest pet peeves when it comes to your pipes.

1. Don’t Pour Grease or Oil Down the Drain

Have you ever heard people talk about eating food to get a ‘grease coat’, or fill themselves up? The same thing that happens when you eat greasy food happens when you dump grease or oil down the drain.

The grease and oil will build up. You won’t notice it at first – you’ll think it’s totally fine, and that as a liquid, down the sink is where it should go. But little by little that grease and oil will clog your pipes and leave you with some serious plumbing problems.

Think about your pipes before pouring that cooking liquid down the drain, and opt for a safer disposal option. For example, wait for fat to solidify before throwing it in your compost bin.

2. Use A Strainer

Clogs are one of the most common plumbing problems, and when it comes to a shower or sink drain, it can become gross and messy thanks to hair and soap residue.

Avoiding the icky is as simple as using a basket strainer. This will help prevent a time-consuming and unpleasant task in the future.

3. Watch What You Flush

There are certain things that should be flushed and certain things that should definitely not be flushed. We’re pretty sure you catch our meaning.

If you start flushing things other than toilet paper and bodily waste down the toilet, you could cause some serious clogs that we’re betting you really don’t want to deal with. That includes hygiene products, cotton balls, prescription medications, and yes…unfortunate fish.

If you’re noticing that your toilet becomes clogged more and more frequently, there are some additional causes that could be the root of your problem.

4. Know Where Your Main Water Valve Is

Plumbing isn’t one of the things that you actively learn about, but it is important to know where your main water valve is and what to do if there is an issue.

If, knock on wood, you have pipes burst, turning off your main water valve will help minimize the damage until we can get there to help. If you don’t know where it is, you’re going to spend a lot of time scrambling while your home sustains significant water damage.

Get a Free Home Plumbing Checklist

5. Test Your Toilet’s Flush Valve Seal for Leaks

Toilet leaks can be a real pain, but if you catch them early they’ll be more manageable and could save you some more serious plumbing problems down the road.

One of the places you’ll likely find a leak is in your toilet’s flush valve seal. The flush valve seal is what keeps water from flowing from the tank to the bowl of your toilet when it isn’t in flushing mode. Catching a leak in your flush valve seal early requires a simple test: food colouring.

No, you didn’t misread that. All it takes is a couple of drops of food colouring in your toilet tank. Check back in a few hours. If some of the coloured water has found its way into your toilet bowl, that means you have a leak.

6. Make Sure Your Main Sewer Drain Is Accessible

While your plumbing is normally out of sight, it is important that your main sewer drain is always free and clear. This is because in case of a sewage line blockage, we need to be able to move quickly and efficiently.

Your drain access point should be uncovered (that means no rugs or carpeting) and easy to get to – no maze of holiday decorations or old children’s toys to contend with.

Top Tip: Basement flooding is a real problem, particularly if you live in certain areas. We have some steps you should follow to help make sure you don’t get an unexpected indoor swimming pool.

7. Prevent Your Plumbing From Freezing

While not a problem in the summer, once winter rolls around temperatures are going to take a dive. Once they get low enough, your plumbing will have an increased risk of freezing.

One of the best plumbing tips we can give you is to make sure that your always have air circulating through your home, and that is at a minimum temperature of 16 degrees Celsius. You should also insulate as many of the outside wall plumbing lines as possible to avoid potential catastrophes.

If you have a room that gets particularly frigid in the fall, and downright miserable in the winter, don’t wait until then to look into options for better air circulation. Take the warm months to come up with solutions.

Top Tip: Outdoor taps can also lead to frozen pipe problems. Make sure your garden hose valve and the hose itself are completely drained of all water before the first frost.

8. Avoid Chemical Drain Cleaners

Chemical drain cleaners are straight up awful when it comes to the health and wellbeing of your plumbing. People tend to go for them because they are advertised as immediately effective, but they can do more damage in the long run.

If you need something to help rid yourself of a pesky clog, BioOne is a non-caustic, safe drain cleaning option. It uses a natural bacteria that dissolves organic matter, without causing harm to the inside of your pipes.

Once you clear up those clogs, keep them away by using BioOne once a month on every drain in the house.

9. Consider Separate Shut Off Valves on Your Fixtures

Your plumbing is going to need repair eventually; it’s inevitable. No doubt you’re not looking forward to the day when you have to shut all of your water off so someone can come and do the work.

We have a way around that. Installing separate shut off valves on your fixtures will eliminate the all water or no water problem, because you’ll be able to turn off the water to different parts of the house when you need to. That way if you have a problem with your bathroom, you can still use the kitchen sink.

10. Prolong Your Tap’s Life

How many times have we been terrified to hear that drip, drip, drip of the faucet, so we make sure the taps are turned off as tight as they can go?

This is actually bad for your tap’s seal; it wears it out more quickly because of the increased pressure it is experiencing every time it is turned to tight. Think of it like a pencil; the more pressure you put on it, the more worn down it gets.

To avoid this, turn the tap until you feel the natural stopping point; don’t force it closed. Like the pencil, you want to apply the amount of pressure that is just right.

We’re There When Things Happen

You can take all the preventative measures in the world, but like anything else, time will take a toll on your plumbing. You’re eventually going to have a problem.

We’re here for when the going gets tough. We handle everything from plumbing repairs to full or partial replacements, and everything in between. We’ll do it all, and we’ll do it right, guaranteed.

Plumbing Basics


Your home's supply and drainage system must always be two distinct subsystems, with no overlapping. At the fixtures (bridges between the two systems), the air admitted by the vent stack and vent pipes keeps the traps sealed and prevents sewer gases from backing up through the drains. See more plumbing pictures.
Your home’s supply and drainage system must always be two distinct subsystems, with no overlapping. At the fixtures (bridges between the two systems), the air admitted by the vent stack and vent pipes keeps the traps sealed and prevents sewer gases from backing up through the drains. See more plumbing pictures.
©2006 PUBLICATIONS INTERNATIONAL, LTD.


Plumbing follows the basic laws of nature — gravity, pressure, water seeking its own level. Knowing this, you can understand its “mysteries” and make dozens of fixes to your home’s plumbing system. You can save yourself time, trouble, and money!

The plumbing system in your home is composed of two separate subsystems. One subsystem brings freshwater in, and the other takes wastewater out. The water that comes into your home is under pressure. It enters your home under enough pressure to allow it to travel upstairs, around corners, or wherever else it’s needed. As water comes into your home, it passes through a meter that registers the amount you use. The main water shutoff, or stop, valve is typically located close to the meter. In a plumbing emergency, it’s vital that you quickly close the main shutoff valve. Otherwise, when a pipe bursts, it can flood your house in no time. If the emergency is confined to a sink, tub, or toilet, however, you may not want to turn off your entire water supply. Therefore, most fixtures should have individual stop valves.

Water from the main supply is immediately ready for your cold water needs. The hot water supply, however, requires another step. One pipe carries water from the cold water system to your water heater. From the heater, a hot water line carries the heated water to all the fixtures, out-lets, and appliances that require hot water. A thermostat on the heater maintains the temperature you select by turning the device’s heating elements on and off as required. The normal temperature setting for a home water heater is between 140 degrees F and 160 degrees F, but 120 degrees F is usually adequate and is also more economical. Some automatic dishwashers require higher temperature water, though many of these have a water heater within them that boosts the temperature another 20 degrees F.

Drainage Systems

Some sink traps have a clean-out plug that enables you to clean the trap without having to remove it from the drain.
©2006 PUBLICATIONS INTERNATIONAL, LTD.

Whether your home is on a sewer or septic system, the systems within your home are essentially the same. Drainage systems do not depend on pressure, as supply systems do. Instead, waste matter leaves your house because the drainage pipes all pitch, or angle, downward. Gravity pulls the waste along. The sewer line continues this downward flow to a sewage treatment facility or a septic tank.

While the system sounds simple, there’s more to it, including vents, traps, and clean outs. The vents sticking up from the roof of your house allow air to enter the drainpipes. If there were no air supply coming from the vents, wastewater would not flow out properly and the water in the traps would need to be siphoned away.

Traps are vital components of the drainage system. You can see a trap under every sink. It is the curved or S-shape section of pipe under a drain. Water flows from the basin with enough force to go through the trap and out through the drainpipe, but enough water stays in the trap afterward to form a seal that prevents sewer gas from backing up into your home. Every fixture must have a trap. Toilets are self-trapped and don’t require an additional trap at the drain. Bathtubs frequently have drum traps, not only to form a seal against sewer gas but also to collect hair and dirt in order to prevent clogged drains. Some kitchen sinks have grease traps to collect grease that might otherwise cause clogging. Because grease and hair are generally the causes of drain clogs, traps often have clean-out plugs that give you easier access to remove or break up any blockage.

Since a drainage system involves all of these components, it is usually referred to as the DWV: the drain-waste-vent system. If water is to flow out freely and waste is to exit properly, all components of the DWV must be present and in good working order. Examine the pipes in the basement or crawl space under your house to help you understand the system better.

Supply and Drainage Subsystems

Fixtures should have individual supply shutoff valves so that you don't need to close the main shutoff to make repairs at the fixture.
Fixtures should have individual supply shutoff valves so that you don’t need to close the main shutoff to make repairs at the fixture.
©2006 PUBLICATIONS INTERNATIONAL, LTD.

The supply and drainage subsystems are two distinct operations, with no overlapping between them. There are bridges between the two, however, and the bridges are what make the plumbing system worth having. In plumbing jargon, any bridge between the supply and drainage systems is a fixture.

Toilets, sinks, and tubs are fixtures. In addition, an outside faucet is a fixture and so is a washing machine. All devices that draw freshwater and discharge wastewater are fixtures, and all are designed to keep the supply and drainage systems strictly segregated.

Some fixtures have individual supply shutoff valves so you don’t need to close the main shutoff to repair them. It’s a good idea to make sure everyone in the family knows the location of the main shutoff valve in your house as well as how to use it. You may want to tag the main shutoff valve so anyone can easily find it.

Before you embark on any plumbing repairs, always turn off the water supply to the fixture or the main shutoff. In addition, check with your local plumbing code official before you add or change any pipe in your house. You will learn what is allowed and what is prohibited and whether or not a homeowner is allowed to do his or her own work. If you get the green light, you can save yourself a lot of money by doing your own repairs.

Top 10 reasons why plumbing is so important

Plumbing and Mechanical Plumbing Topic

1.   Plumbing harnesses a precious resource —water —to use safely for health, hygiene and well-being. Plumbing makes possible the miracle of clean, convenient water —something is often taken for granted.

Why plumbing matters to health, safety, water sustainability and more -  Ludwig, Smith & Walker, Inc.


2.   Plumbing manufacturing innovations to gain water efficiency have dramatically reduced the amount of water used through toilets, showerheads, faucets and other plumbing products. For example, WaterSense plumbing products meeting Environmental Protection Agency criteria have saved consumers 757 billion gallons of water and $14.2 billion in water and energy bills since 2006, according to the EPA.


3.   To assure customer satisfaction, WaterSense products are certified to perform as well or better than standard models —all while saving at least 20 percent more water.


4.   The increased use of water-efficient plumbing is an important, yet often overlooked, part of the water sustainability solution. The EPA estimates that the United States could save 3 trillion gallons of water and over $17 billion dollars annually if every U.S. household converted to WaterSense products. High-efficiency plumbing in commercial facilities can help save even more.


5.    Modern plumbing products help regions affected by droughts and water shortages to use water more efficiently. For example, Denver reduced water use to a 40-year low in December 2014, according to the Denver Post. Contributing to the decrease was replacing 3,200 3.5 gallons per flush (gpf) toilets in the Denver Public Schools with 1.25 gpf toilets. Denver has plans to replace 6,800 more by 2018.


6.   Water efficiency contributes greatly to energy savings. Less water used means less water heated and less water transported. Installing WaterSense-labeled faucet aerators in bathrooms, for example, help save water and energy.


7.    Plumbing brings comfort and beauty into homes and lives. Kitchens and bathrooms not only serve functional purposes; they provide the refuge of comforting meals, soothing baths and restorative relaxation.

How to Arrange Furniture in Every Room | Better Homes & Gardens


8.    The plumbing industry is a strong economic engine, providing jobs and livelihoods to millions of people around the world.


9.    The ability of plumbing and sanitation systems to deliver clean water and remove waste has protected populations from communicable disease throughout history. There is acknowledgment from many within the public health community that clean, drinkable water has likely protected more lives and extended life expectancy more than any medical advancement. Plumbing advancements continue to protect lives in developing nations.

Clean Water and Wastewater Are Important - Water Footprint Calculator


10.   A future of water sustainability is an achievable prospect, as plumbing manufacturers work with allies in safe plumbing and water efficiency to find solutions.

Source: PMI

New Construction Residential Plumbing in Bucks County

When building a new house, plumbing is one of the most crucial elements to get right. Creating an environmentally sound and efficient system for distributing water throughout your home can save you a lot of hassle and reduce water usage over the life of your system. Cooper Mechanical is here to help you design your custom plumbing system, offering expert guidance on the best and most responsible way of plumbing your new construction project. We are experienced plumbing contractors working in Doylestown, as well as upper to mid-Bucks County, Ottsville, and the surrounding areas in Pennsylvania and New Jersey.

Planning Your New House Plumbing

Installing Plumbing In A Newly Constructed Home? - HomeTriangle

The Cooper Mechanical team knows that every house has unique requirements and every homeowner has a personal vision of the perfect kitchen or bath that will make them feel at home. That’s why our plumbers will work with you side-by-side to design your ideal custom bathroom and kitchen and entire new house plumbing system. In addition to helping you plan, we’ll help you with the selection of all your plumbing fixtures, such as faucets, sinks, and tubs. Our plumbers are very serious about ensuring new homes have high-quality, long-lasting pipes, fittings, and fixtures. When you choose quality materials for your new house plumbing project, the benefits are long-term. At our retail kitchen and bath showroom, you’ll find a wide selection of attractive, durable fixtures, spa tubs, sinks, master bath showers, touchless toilets, bidets, and other items from top brands, like Kohler, Moen, Toto, American Standard and more. Browsing our selection can help you design the perfect bathroom and kitchen for your new home. To start getting ideas for your project, visit our showroom today.

Expert Plumbing Installation

Family Life Magazine Expert plumbing service – here is what you should know

Whether your new house plumbing system requires the installation of battery back-up sump pumps, gas lines, or leak sensors, our expert installers have the knowledge and experience to get the job done right. Our plumbers are fully licensed and trained in industry best practices to deliver high-quality installations.

Plumbing Done By Professionals

Why Plumbing Repairs Are Best Left to Professionals

As expert plumbing contractors, the Cooper Mechanical team is up-to-date with all of the various building codes of each of the townships we work in, and we are fully licensed to provide you with service and installations that are the standard of excellence. Your new house plumbing project should be as worry-free as possible – we’re here to make it easy for you from start to finish. We’ll be with you to answer all of your questions and guide you from the planning stage to the final inspection.

Home Services You Can Count On

After your new house plumbing project is complete, you can count on Cooper Mechanical for many of your other home service and repair needs. Along with emergency, 24/7 plumbing repair services, we also offer heating and air conditioning repairs, service, and installation throughout Doylestown, upper to mid-Bucks County, Ottsville, and surrounding areas in PA and NJ. To schedule a consultation for your plumbing project or to learn more about our services, contact us online or call 610-228-4405 today.

5 Things to Ask Your Home Improvement Contractor

Things to Ask Your Home Improvement Contractor

Choosing a home remodeling contractor is a big decision. Renovating your house can be a significant financial investment, so knowing what to expect before the project starts will help you get ready for the process. After all, you are letting the contractor and their crew in your home, and you’ll also likely be paying them a lot of money. This is why it’s best to do a little bit of research so that you can make sure you’re choosing the right person for the job.

Here are five questions to ask your contractor before renovating your home.

1. Can you show me some of your past projects and references?

Any good remodeling contractor will have examples of their past work. If you’re having home exterior work done, ask for the addresses so that you can see the contractor’s quality of work with your own eyes. If your project is indoors – such as a bathroom or a kitchen, for example – you may only be able to see the pictures.

You should also ask if the contractor can provide references. For some people, the mere fact that a contractor is willing to provide them is enough. However, some may also need to call and check. If you call, ask the client what they liked or didn’t like, and how happy they were with the finished product.

2. What’s the procedure if a change has to be made?

Even the best thought-out remodeling projects don’t have to go according to plan. The construction team could find an unforeseen structural problem that has to be addressed, products may be out of stock, or delivery might go wrong. If any of those issues occur, changes have to be made to the construction, which could also affect the budget and schedule.

Ideally, you’ll want to check these changes and document them in a change order. A change order is an extension to the original contract. This could change to the price and scope of work detailed as well.

3. The documentation 

Do you have a contracting license?

States, cities, and even counties have different requirements regarding whether contractors must get a license or an alternative credential, so you’ll want to make sure that your contractor has all of the certifications necessary in their field of expertise — for example, you wouldn’t want to get a roofer who has a license in carpentry. Having only a business license is not enough, since it allows individuals to do business but doesn’t mean that they are a credentialed or licensed contractor.

Can I see your certificate of insurance?

It’s not enough to ask a contractor if he’s insured. Rather, you should ask how he is insured. Contractors should have both liability insurance and workers’ compensation specifically for the kind of job they perform. Taking a look at insurance certificates will give you the peace of mind that they are not insured for something different than the job you’re hiring them for.

Will, you set up the inspections and get the permits needed for this job?

Not every job requires inspections or permits. Most remodeling projects that change the structure of the home in some way do. Your contractor must not only know what permits you need and how to get them.

4. How will you communicate with me?

With every possible means of electronic communication at hand, you may have ideas about how you would like to get information about your project. Your contractor probably also has specific ways they like to communicate – cloud-based schedules, daily emails, or just phone calls. Either way, Make sure you understand how you will receive information and be contacted.

If the contractor’s way doesn’t give you what you think you’ll need, agree on a and format and method so that you know what’s going on on a daily basis. Weekly meetings at a specific time are a good way to make sure your contractor will get your questions answered in person.

home renovation projects

5. What is the payment schedule, and what’s your estimated timeframe for the project?

You’ll want to get a general picture of how the project will look. The contractor doesn’t have to give you a daily timeline, but they should be able to give you a broad idea of how long they think the project will take.

The contractor also doesn’t have to provide a budget down to the cent. They should, however, be able to give you a solid idea of what your costs will look like.

The more detail you include in these documents, the better. Asking for an estimate will help you get a more detailed picture of where your money will go. This way, if you have questions about what is being spent, you can ask about specifics.

A detailed estimate

Be sure to get costs connected to your contract in writing. Make sure that all estimates are detailed. This way you can compare offers against each other.

Be careful of any quote that is much lower than the rest, as it may not include all labor and materials. On the other hand, if you get a much higher estimate than the rest, this can also mean that the other contractors were missing a key factor.

The payment schedule depends on the company, but you should never pay the whole amount upfront. Different contractors may offer different payment options, and different payment options may work better for your situation. However, never pay for the work entirely before the job’s completion and inspection. Fair down payment is normal and fine, but customers should establish a payment plan connected to progress. They should also hold back the final payment until the job is done to the consumer’s satisfaction.

Are you thinking about improving your home? Feel free to contact 1-800-HANSONS for a free estimate.

Tips on Planning the Rough Plumbing In Your Home Renovation

Tips on Planning the Rough Plumbing In Your Home Renovation

Planning ahead is a wise move in any home improvement. When plumbing is concerned, planning becomes a necessity. Whether you’re at the budgeting stage or are trying to compile an accurate material list for a DIY plumbing project, planning out the rough plumbing is an important step.

You’ll need to make some decisions on the type of materials used, the location of various elements in the system, and the basic layout of the plumbing itself. If you’re putting in most or all of the system yourself this plan will be an essential tool. And even if you are hiring a professional plumber to come in you can use the plan to supervise more effectively.

How to Make Good Material Decisions

It’s still up for debate between plumbers and others in the industry, but in general, the newer plastic designs within your supply plumbing do not measure up to the quality seen in copper plumbing. Remember though that copper pipes need to be soldered together during installation. Often in DIY projects, this could pose a difficulty, but if you have hired a pro copper plumbing won’t be a problem at all.

How to Help Employees Make the Right Decisions | Inc.com

PEX is another choice in supply lines. This composite-type product offers decent durability and can be attached without the need to solder. Plumbers and home handymen alike are opting for PEX products in their home plumbing.

For the drainage and vent pipes, your only choice should be ABS, which is a rigid plastic that requires special glue for all attachments. Make a note of where your ABS venting is and avoid hanging shelving and pictures in those locations, so as not to puncture the plumbing and release noxious gases into the house.

Cover the Three Elements For Today and In the Future

There are three main components of your plumbing system: water supply, drainage, and venting. Draw out a rough plan showing each of these three elements and don’t forget to include them for future plans of expansion.

If you will be in need of another bathroom or should be replacing your standard tub shower with something a little more luxurious, be sure the rough plumbing will account for it. The size and location of each pipe in the plan should take all of the eventualities into play.

Plan for a Water Inlet System

San Diego Repipes | Repiping in San Diego | My Plumber CA

Engineering and design play a major role in plumbing. To provide the optimum performance and safety in your home, turn to the specifications required in the local building code. It may be that air chambers are needed at each fixture. This is generally a 10 to the 12-inch chamber that extends above the fixture. It is simply covered with a plug cap but serves as a way to eliminate water hammering. This condition is usually a result of variations in pressure as the taps open and close and an air inlet chamber is the best way to get rid of that.

A design for your rough plumbing will come in handy during many stages of a major home improvement project. If you are tackling the plumbing yourself a detailed design will help you have a better material list. If you’re bringing in the pros this sketch of the supply, drainage, and venting pipes will give you a good idea of what’s happening and can help you to be a better and more satisfied customer. Either way, a design of your rough plumbing is well worth the time and effort.


Posted by: Diana

Quality Denver Plumbing Company and Denver HVAC Company

Welcome!  Plumb Pros Inc. is a BBB A+ Rated Denver Plumbing company, Denver Heating company, Denver Air Conditioning company, and a Denver Drain Cleaning company. We are licensed and insured in Denver and all local municipalities. We provide affordable, guaranteed plumbing service, heating service, air conditioner service, drain cleaning service, and excavation service to residential and commercial customers.

Our Mission…For Plumb Pros Inc. to be synonymous with bringing back Genuine, Good Ol’ Fashioned Service in our hometown of Denver, Colorado where our name and reputation truly matters.’  

What you can expect from Plumb Pros Inc.:

  • Hassle-Free, Up Front Pricing. No Surprises!
  • Fast, Friendly Service
  • Quality, Guaranteed Work
  • Uniformed, Background Screened Technicians
  • Conveniently Scheduled Appointments
  • Same-Day or Emergency Service Available

Plumb Pros Inc. is proud of our A+ Rating with the Better Business Bureau and always strives to maintain our excellent customer service reputation by providing quality, guaranteed professional service. We keep our work trucks stocked with quality plumbing parts and equipment and the tools necessary in order to do the job right the first time.

As a locally owned and operated company, we have a solid understanding of Colorado’s unique climate and codes so you are always provided the proper solution to your plumbing, drain cleaning, heating or cooling needs.  We proudly support local businesses, area schools, and reputable non-profit organizations.

If you are in need of quality Plumbing services in Denver, call us!. Plumb Pros Inc. would love to be your trusted plumbing, heating, cooling, drain service, and excavation company.

Other Service Locations:

We serve the entire Denver Metro area including Arvada, Aurora, Boulder, Broomfield, Brighton, Centennial, Englewood, Federal Heights, Fort Lupton, Golden,  Green Valley Ranch, Greenwood Village, Lafayette, Lakewood, Littleton, Lochbuie, Lone Tree, Northglenn, Thornton, Stapleton, Superior, Westminster, and Wheat Ridge just to name a few.

For more information on the plumbing services we provide in Colorado, contact us today.

3 Ways Your Household Can Conserve Water

contentImage

The way you use your plumbing can have a significant impact on the environment. Conserving water does more than just reduce consumption; it also helps lower greenhouse gas emissions associated with treating and distributing municipal water. If you want to help the environment and keep bills to a minimum, follow these water conservation tips.

How to Decrease Your Water Usage

1. Upgrade Plumbing Fixtures

Upgrading to high-efficiency water fixtures can significantly reduce how much water your family uses. For example, a tankless water heater requires much less water than a standard model because it only draws water into the system when a faucet is turned on. Low-flow showerheads, toilets, and faucets use fewer gallons per minute than standard fixtures.

2. Limit Running Water

plumbing

Many people keep the water running when it’s not necessary. Don’t leave the faucet running the whole time when shaving, brushing your teeth or washing your hands.

While this might not seem like a significant change, you likely perform these activities several times per day, and the savings can add up quickly. You can also lower water consumption by limiting showers to 10 minutes or less.

3. Have Leaks Fixed Quickly

A dripping faucet or leaky toilet can waste countless gallons of water — even if the leak seems relatively minor. Major leaks that require re-piping can be even more wasteful if not addressed quickly.

Whenever you notice a potential plumbing leak, call a professional to fix it right away. Addressing the leak before it gets worse will save water and help you avoid extensive damage to your home.


If you want upgraded water fixtures or prompt plumbing repairs, Buck’s Plumbing & Sewer Service in Cookeville, TN will help your family reduce water consumption. Serving Putnam County and the surrounding areas since 1960, this family-owned and -operated company offers prompt work that’s always completed to the highest standards. To learn more about their services, visit them online or call (931) 528-1157.

Bathroom Renovation: Bathroom Plumbing Material Choices

Bathroom Renovation: Bathroom Plumbing Material Choices

Unless your bathroom renovation is purely cosmetic in nature, bathroom plumbing may very well be part of your project requirements. Depending upon the age of your home, you will be working with one of the following types of pipes: plastic PVC (ABS or CPVC), copper, galvanized iron, or cast iron.

If plumbing will be part of your bathroom renovation design, this would be the perfect time to replace old plumbing with new. This would avoid the possible inconvenience and costs incurred by a bathroom plumbing problem at a later time.

Bathroom renovation cost, tools, materials, time involvement, and project complexity will be determined not only by the extent of your bathroom renovation but also by the type of pipe used in plumbing.

Plastic Pipe

Lightweight, inexpensive, and easy to use, plastic pipe is popular for residential plumbing purposes. Available in PVC, ABS, PE, and CPVC forms. There is also PB, but its use is prohibited in many local codes.

Available as rigid and flexible plastic pipe. PVC pipe resists chemical damage and heat better than ABS and meets all plumbing code requirements for above-ground use. CPVC withstands the high temperatures and pressure of water supply systems.

Use plastic pipe for the following purposes:

  • ABS or PVC pipe with a drain-waste-vent (DWV) NSF rating; use for sink traps and as a plastic drain pipe for bathroom sink plumbing.

Pipe type and grade ratings are stamped on each pipe for easy identification. Please note: ABS use is restricted in some local plumbing codes.

Check with a licensed plumbing contractor, certified building inspector, or local residential plumbing code guidelines before beginning any renovation project that includes plumbing.

Copper Pipe

The best material is available for water supply pipes. Available as a rigid and flexible pipe; chromed copper is also available and a popular choice for exposed areas. Copper pipe resists corrosion; sweat-soldered joints are durable.

Rigid copper pipe is approved for home water supply systems by all local codes and is available in 3 wall thicknesses:

  • Type M – thin and inexpensive; a good choice for bathroom plumbing do-it-yourself projects.
  • Type L – strong, easily soldered; preferred choice of the home renovation contractor who wants top-notch quality bathroom plumbing.
  • Type K – the heaviest wall thickness of all copper pipe for plumbing; used most often for underground water service lines.

The flexible copper pipe comes in 2 wall thickness grades; types L and K. Although approved for most home water supply systems, type L is used primarily for gas service lines

DWV copper pipe is for drain systems but is seldom used because most codes allow low-cost plastic DWV pipe.

Galvanized Iron Pipe

Often the type of water supply and small drain line pipe found in older homes; identified by a zinc coating and iron pipe thread fittings.

Iron pipe is strong but difficult to cut; it corrodes with age and eventually needs replacement. Low water pressure is often a sign that rust has built up inside the pipe.

Old galvanized iron pipe systems can be difficult to work with; they are not recommended for new bathroom renovation purposes. These types of bathroom plumbing repairs and alterations are best left to a plumbing contractor.

Cast Iron Pipe

Rarely used in new bathroom plumbing, the cast iron pipe can be identified by its dark color and rough surface. It is strong, but difficult to cut and fit pieces together. Hubbed fittings can develop leaks, and pipes can rust through.

When the plumbing code book allows, plastic pipe replacements should be made. Use a special fitting called an “banded coupling” to connect new plastic pipe to existing cast iron. Cast iron pipe repair is another bathroom renovation project best left in the hands of a reliable bathroom remodeling contractor.

We hope this article on bathroom plumbing material choices has been helpful. If you require assistance with your bathroom renovation idea, why not post project requirements at TrustedPros.com. It is fast, easy, and FREE!

Reliable bathroom remodeling contractors in your area are ready to bid competitively on your project. And the best part is you will be under no obligation to hire anyone!